> ## Documentation Index
> Fetch the complete documentation index at: https://docs.lytix.co/llms.txt
> Use this file to discover all available pages before exploring further.
# Video
> How to use video with Lytix
**🚨 Note** Currently this is only supported for the [**Gemini** integration](/Quickstart/gemini-integration).
Lytix supports saving and re-playing video sessions. Further, you can self host the video storage to ensure your data is private.
# Setting Up Video Storage
Lytix supports using Azure Blob Storage for video storage. To get started
### Prerequisites
* [Azure CLI](https://learn.microsoft.com/en-us/cli/azure/get-started-with-azure-cli)
### 1. Creating a Storage Account
First we need to create a storage account (AKA bucket). To do that we'll need to create a resource group along with a storage account.
```sh
az group create --name lytix-storage-resource-group --location westus
{
"id": "/subscriptions/...",
"location": "westus",
"managedBy": null,
"name": "lytix-storage-resource-group",
"properties": {
"provisioningState": "Succeeded"
},
"tags": null,
"type": "Microsoft.Resources/resourceGroups"
}
```
Next you can create a storage account. **Rememeber storage accounts are globally unique, so you'll need to change `lytixvideos` to something unique like `$COMPANY_NAME-videos`**
```sh
az storage account create --name lytixvideos --resource-group lytix-storage-resource-group
{
"accessTier": "Hot",
"accountMigrationInProgress": null,
...
```
Then create a container within the storage account. Remember to change `lytixvideos` to the name of your storage account you used in the step above
```sh
> az storage container create --name lytix-videos-gemini --account-name lytixvideos
{
"created": true
}
```
**Note** The important values to remember here are the Store Account Name (e.g. `lytixvideos` above) and the Container Name (e.g. `lytix-videos-gemini` above).
### 2. Create a Service Principal
Next we need to create a service principal so that Lytix can access the storage account (AKA IAM role).
```sh
> az ad sp create-for-rbac --name lytix-service-principle
The output includes credentials that you must protect. Be sure that you do not include these credentials in your code or check the credentials into your source control. For more information, see https://aka.ms/azadsp-cli
{
"appId": "123",
"displayName": "lytix-service-principle",
"password": "123",
"tenant": "123"
}
```
❗ Make sure to **note down** these values, these are the credentials Lytix will use to access the storage account.
### 3. Upload Credentials to Lytix
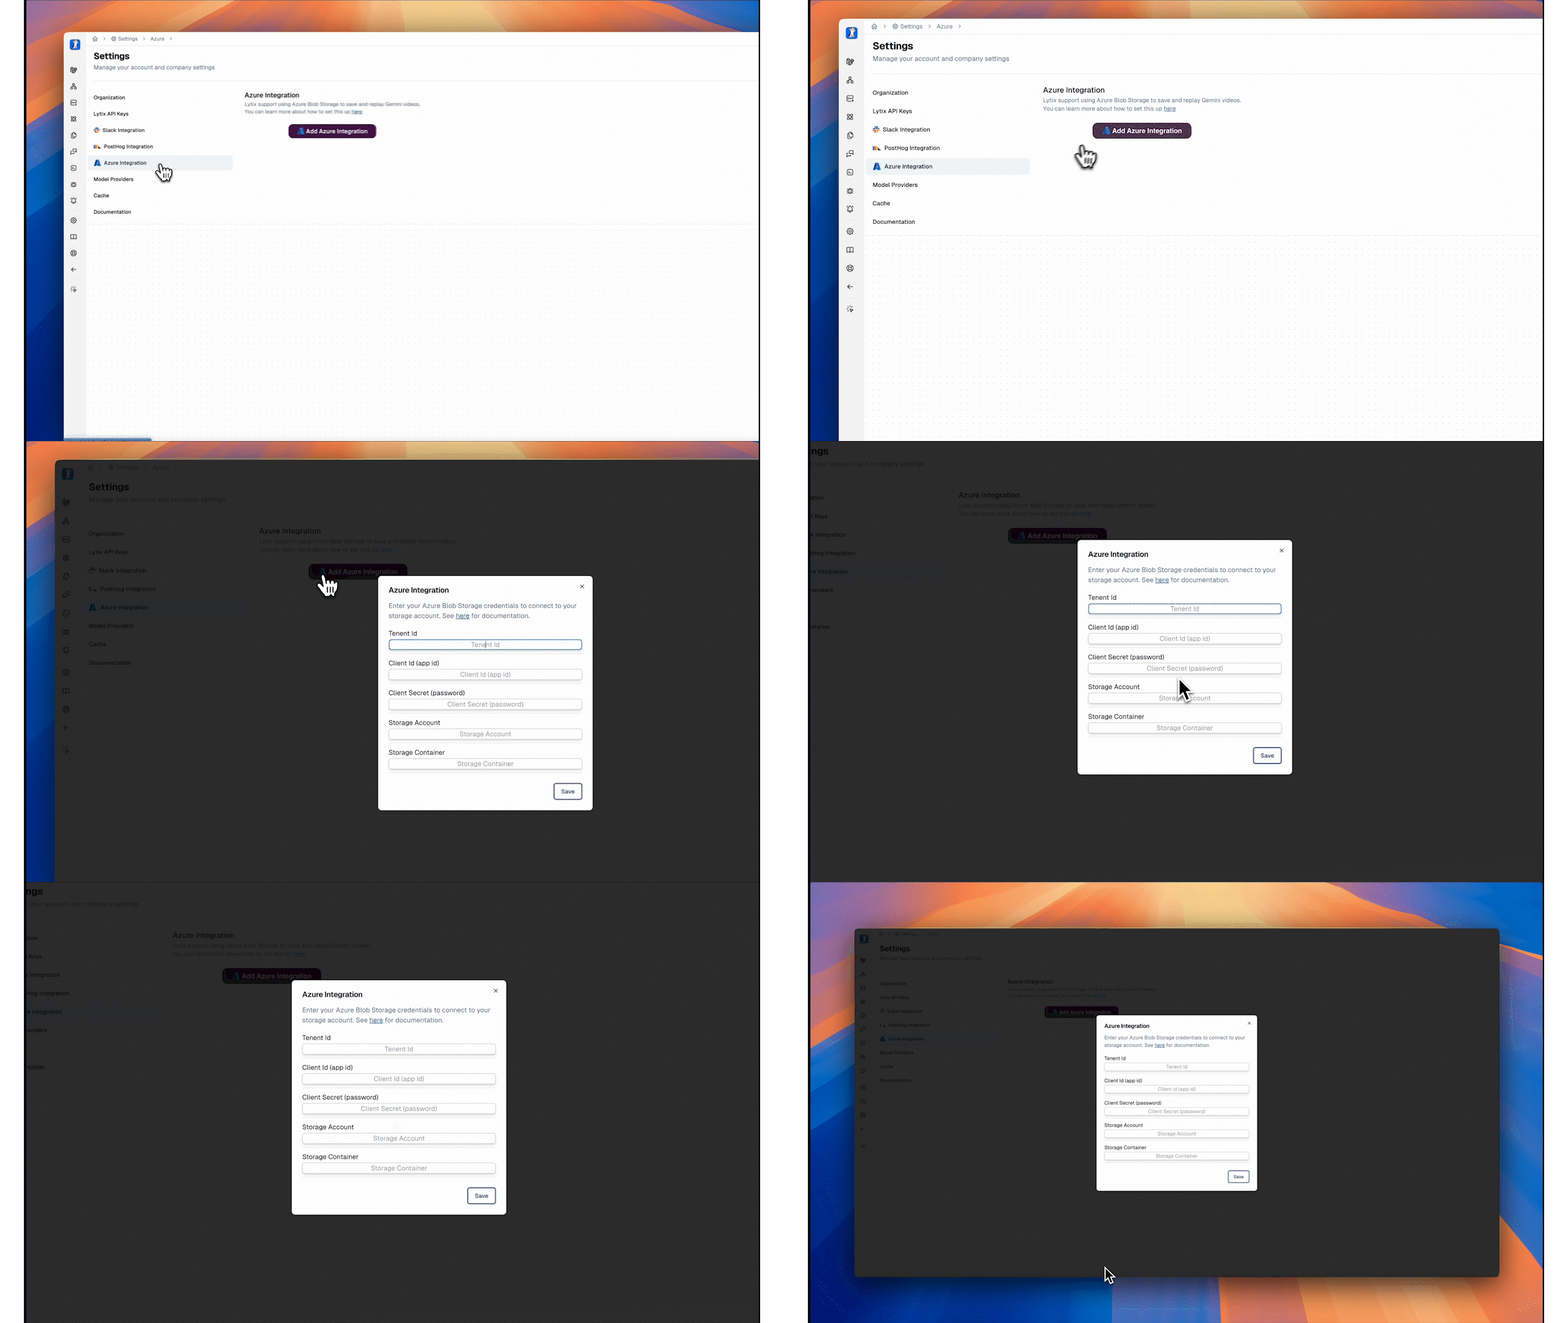
Head over to the [Azure Integration Page](https://lab.lytix.co/home/settings/azure) and click "Add Azure Integration".
The values needed are:
1. `tenantId`: The `tenant` from step 2
2. `clientId`: The `appId` from step 2
3. `clientSecret`: The `password` from step 2
4. `storageAccountName`: The storage account name (e.g. `lytixvideos`) from step 1
5. `storageAccountContainer`: The storage account container (e.g. `lytix-videos-gemini`) from step 1
### 4. Attach Blob To Service Principal
Head over to the newly created storage account in the Azure Portal by going to the Storage Accounts resource. And click "Add Role Assignment"
We'll need to add both the **`Storage Blob Data Contributor`, `Storage Account Contributor` and the `Storage Blob Data Reader`** since lytix will create short lived URLs to view the videos.
**The service principle will not show up until you search for it.** If you have been following guide directly, the name of the service principle will be `lytix-service-principle`.
{/*  */}
{/*

Now naviagte to the newly created storage account and click "Add", then "Add Role Assignment"
 */}

**Note** It does not seem like you can select multiple roles at once, so you'll need to add each one individually :/
{/* Now we can select the service principal we created earlier. */}
{/*

Now just click "Review + assign" and you're all set!
 */}
### 5. Repeat For All Users / Service Principals
Repeat step 4 for all users / service principals that will be uploading videos. For example, if you have a user / service principle for your backend task that uploads videos, you'll need to add them here.
# Sending Video To Lytix
After you've setup the Azure Integration and have your credentials ready, you can start sending video to Lytix.
We've created a simple wrapper script to make sending video to Lytix easy.
### Download the lytix client
```sh
npm install @lytix/client
```
### Uploading Video
**Prerequisites**
Setup your lytix credentials in your environment variables. See [here](/APIKeys/api-key-setup) to get your API keys, and [here](/APIKeys/env-var-setup.mdx) on how to set your environment variables.
Now right before you make your Gemini query, you can upload the video to your storage account and get a lytix video id.
```ts
import {
UploadFileToAzureAndLytix,
} from "@lytix/client";
const filePath = "/some/path/niceAnimation.mov";
const lytixVideoId = await UploadFileToAzureAndLytix({
filePath: filePath,
storageAccountName: "lytixvideos",
containerName: "lytix-videos-gemini",
mimeType: "video/quicktime",
});
```
**Note** Make sure the credentials you are using have the necessary permissions to upload to the storage account.
Then upload your file to Gemini as you normally would.
```ts
import { GoogleAIFileManager } from "@google/generative-ai/server";
const fileManager = new GoogleAIFileManager(
"$GEMINI_API_KEY"
);
let uploadResult = await fileManager.uploadFile(filePath, {
mimeType: "video/quicktime",
});
/**
* Await until the file is uploaded
*/
while (uploadResult.state !== "ACTIVE") {
/**
* Delay + requery
*/
await new Promise((resolve) => setTimeout(resolve, 1000));
uploadResult = await fileManager.getFile(uploadResult.file.name);
}
```
Finally, pass the `lytixVideoId` when making your Gemini query.
```ts
import { LytixCreds } from "@lytix/client";
import { GoogleGenerativeAI } from "@google/generative-ai";
const genAI = new GoogleGenerativeAI(
"$GEMINI_API_KEY"
);
const customHeaders = new Headers({
"lx-api-key": LytixCreds.LX_API_KEY,
// Just pass the lytix video id here
"lytix-video-id": lytixVideoId,
});
const requestOptions = {
customHeaders: customHeaders,
baseUrl: "https://api.lytix.co/proxy/v1/gemini",
};
const model = genAI.getGenerativeModel(
{
model: "gemini-1.5-flash-latest",
},
requestOptions
);
const result = await model.generateContent([
"Tell me about this video.",
{
fileData: {
fileUri: uploadResult.uri,
mimeType: uploadResult.mimeType,
},
},
]);
```
And you're all set! You'll see the video in the Lytix platform.
Video Coming Soon ⚡